
Sometimes it’s very useful for testing just to hit a private NuGet server directly. So, here is two methods.
- Via the PM console:
Find-Package -Source <SERVER URL>
- Via the NuGet tool:
nuget list -Source <SERVER URL>
Sometimes it’s very useful for testing just to hit a private NuGet server directly. So, here is two methods.
Find-Package -Source <SERVER URL>
nuget list -Source <SERVER URL>
The cross-platform TFX tool is, among other things, what you use to create new boiler-plate VSIX extensions (to populate with your own information) as well as to upload individual Release Management (vNext) tasks to TFS 2015. Previously, I’ve logged in using a fully-qualified UNC-formatted username (\domain\dustin.oprea) but this started, suddenly, not working for me. I have not applied any noteworthy updates. I did recently have to change my password (per group policy), but that may or may not have affected it.
As my web-based TFS UI indicated that I was logged-in as “DOMAIN\dustin.oprea”, I unsuccessfully tried logging in as that at the command-line. Eventually, I opened up a private session within the browser in order to log-in using that same username but the UI refused to log me out (even though it was a private session, I was always logged-in). I tried clearing web credential in Windows, but, alas, nothing was stored there (if that could’ve even helped).
I also restarted the system just in case there was credentials-related caching in the system, in or outside of TFS’ application pool.
It turns out that now logging-in with a fully-qualified email-account as my username works just fine.
For example:
C:\>tfx login --auth-type basic --service-url http://localhost:8181/tfs/DefaultCollection --username dustin@email.com
TFS Cross Platform Command Line Interface v0.3.20
Copyright Microsoft Corporation
> Password:
Logged in successfully
Thanks, TFS. Do you think you might unify how users are logging-in both at the command-line and in the UI? Maybe?
Thanks to Could Not Connect, Invalid Credentials, Bad Username/ID/Password for drawing my eye to this potential option.

ClickOnce functionality allows you to create an application that checks for updates. It can do this before it starts (you’ll always run with the latest version, even if you will see the update-check when it starts) or after it starts (better for large updates). When you’re publishing, you can also specify the minimum acceptable version that is to be running, which will automatically do the update when in violation. It obviously follows that you can also specify whether the application is allowed to be run when offline (read: when it can’t check for updates).
Though most aspects of Microsoft development are unnecessarily complicated this is ridiculously easy.
Open project properties and go to the “Signing” panel:

Check the “Sign the ClickOnce manifests” checkbox. Click the “Create Test Certificate…” button and create a self-signed certificate (you can create an official one after you adopt and formalize the process):

Navigate to the “Publish” panel and fill in the path to push files and the UNC/URL that that directory can be accessed at for update polling and downloads:

Click on the “Updates…” button and check “The application should check for updates”. Make sure to change where in the lifecycle the update should be performed if the default doesn’t work for you. Check “Specify a minimum required version for this application” and set that version if you want the update to be automatic. When you enable this for the first time, it will likely default to the version that is currently set to publish:

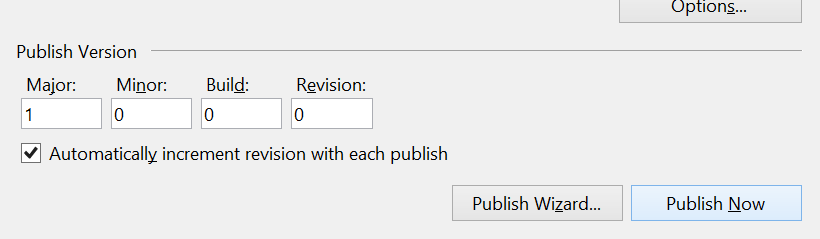
Back in the top “Publish” panel, click on “Publish Now”. You may change the version factors of what you’re publishing, but, as the “Automatically increment revision with each publish” checkbox is checked by default, you shouldn’t have to:
An Explorer window with the published files will probably be opened for you:

Go ahead and click setup.exe to install. Forgive the unsigned-publisher security warning:

You’ll also be presented with a security warning due to the self-signed certificate. Click on “More info” to expose the “Run anyway” button and then click it:

Go ahead and do another publish (it’ll automatically push using a higher version than last time). Run the application. You’ll be prompted to update unless you changed the minimum-version in order to install automatically:

TFS 2015 lets you define build and release workflows comprised of discrete tasks. Although it provides a handful to you (build-specific, release-specific, general utility, etc..), you can also write your own “Extension Tasks” and upload them. I previously described how to use Microsoft’s tfx tool to upload a single task from the command-line.
You might also need to upload one or more tasks that have been packaged into a VSIX file (Microsoft’s Visual Studio Extension packaging format). These are essentially zip-files that have a manifest and one or more directories. In this case, those directories represent tasks (they each have a task.json file). Although you can probably do this from the command-line using the tfx tool, you can also use your TFS’s web UI to do it. Note that this process will need to be repeated for each collection that you’ll want the extension to be available in.
Click the “Shop” icon to open the corresponding menu and then click on “Browse of Extensions”:

Click on the “Manage extensions” button in the middle of the page. It’s not the same link/button as the previous one even if they have the same text:

Click on “Upload New Extension”. Browse to the VSIX file and upload it.

After, you’re presented with a list of installed extensions:

Observe that the extension populated on to the previous local-management screen. Click on it:

Now, click on “Install”:

After installation, the new tasks will be available within the lists of available tasks.
TFS 2015 embeds previous vNext functionality to provide you workflow-driven, scriptable builds. This is based on establishing discrete tasks that can be reused between your build definitions and release definitions as relevant.
You can extend the basic set of tasks, which, though sufficient for very simple builds and releases, might quickly become insufficient. New tasks are called “extension tasks”. Discussing how to create one is out of scope for this post so we’re assuming that you already have a path that describes a task. At the very least, there will be a task.json file in it.
What comes next?
This is a cross-platform project that requires NodeJS to be installed locally. The TFS-CLI project is hosted here: https://github.com/Microsoft/tfs-cli.
To install:
npm install -g tfx-cli
On a workstation flavor of Windows (in my case, Windows 8.1):
If you’re running a server flavor of Windows you’ll have to update the “Web Server” role instead:
(https://github.com/Microsoft/tfs-cli/blob/master/docs/configureBasicAuth.md)

Make sure to close and re-open IIS Manager afterward.
Under the application, click “Authentication”, right-click on “Basic Authentication”, and click “Enable”. Make sure you enable “Basic Authentication” under the application, not the site. Setting it on the site will be ineffectual.
C:\>tfx login --auth-type basic
TFS Cross Platform Command Line Interface v0.3.20
Copyright Microsoft Corporation
> Service URL: http://localhost:8181/tfs/DefaultCollection
> Username: yourdomain\dustin.oprea
> Password:
Logged in successfully
I tested using the “XLD” task, here:
Unzip and install by passing the directory path:
tfx build tasks upload --task-path xld
Now, if you go to your list of release tasks (where the XLD task ends-up), you’ll see it:


You must be logged in to post a comment.